
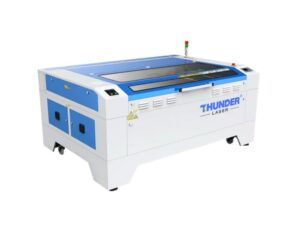
Today, we’re going to make something with the Thunder Nova Laser Cutter.
Let’s go burn stuff.
Responsibly.
Step 1: Start With a Design
First, we need something to make.
Maybe it’s:
- A robot part
- A sign
- A name tag
- A logo
- A template
- Something weird that seemed like a good idea five minutes ago
We use LightBurn to prepare projects and send them to the laser. But you can also use RDWorks which is free. You can install it at home, prepare a project and bring it into school ready to go.
You can draw simple shapes and text directly in LightBurn, or import designs made somewhere else.
For cutting parts, SVG and DXF files are usually great choices.
For engraving photographs or images, PNG and JPG files work well.
Once your design is in LightBurn, it’s time to tell the laser what to do with it.
Step 2: Decide What Gets Cut
LightBurn organizes different operations into layers.
For example, maybe we’re making a wooden team sign.
We might want to:
- Engrave the Malfunctionz logo
- Engrave some text
- Cut the entire sign out
Those should be separate layers.
Each layer gets its own settings.
The two big choices are:
Line
The laser follows the lines in your design.
We usually use this for:
- Cutting
- Scoring
- Outlines
Fill
The laser moves back and forth across an area.
We usually use this for:
- Text
- Logos
- Filled shapes
- Engraving
One important thing:
The color does not determine what the laser does.
A red line is not automatically a cut.
A black object is not automatically an engraving.
The layer settings determine what happens.
Step 3: Choose Speed and Power
Now we tell the laser how much energy to put into the material.
Two settings matter a lot:
Speed
How quickly the laser head moves.
Slower usually means more energy is delivered to the material.
Power
How much laser power is being used.
More power means more energy.
Cutting all the way through something usually requires more energy than engraving its surface.
There is no universal setting for “wood” or “acrylic.”
The correct settings depend on:
- The material
- The thickness
- The type of cut
- The condition of the machine
- The result you’re trying to get
Use settings we’ve already tested whenever possible.
If we’re trying a new material, test it on a scrap first.
LightBurn also has a Material Test tool that can try several speed and power combinations at once.
That’s much better than experimenting on the part you spent three hours designing.
Step 4: Check the Order
Imagine we’re engraving a logo on a piece of plywood and then cutting the plywood into a circle.
Which should happen first?
The engraving.
Why?
Because once we cut the circle loose, the part can move.
If it moves before the engraving happens, the engraving may end up somewhere completely different.
A good general order is:
Engrave → Cut holes → Cut the outside
LightBurn normally runs layers in the order they’re listed.
Take a second and make sure that order makes sense.
Step 5: Preview Everything
Before we go anywhere near the actual laser, click Preview.
Watch what LightBurn thinks the machine is going to do.
Look for:
- Missing parts
- Unexpected cuts
- Duplicate lines
- Things happening in the wrong order
- Really slow engraving
- Anything that just looks weird
This is one of the cheapest places to discover a mistake.
If the preview looks wrong, fix it now.
The laser will not become more intelligent once we press Start.
Step 6: Choose the Material
Now we’re going to put something inside a machine containing a powerful CO₂ laser.
So this part matters.
Common materials we can usually use include:
- Laser-safe plywood
- Solid wood
- Acrylic
- Cardboard
- Paper
- Cork
- Some fabrics
- Other materials specifically approved for laser use
But there are also materials that should never go into the laser.
Do not cut:
- PVC
- Vinyl
- Unknown plastics
- ABS
- Polycarbonate / Lexan
- Styrofoam
- Foam core
- Fiberglass
- Materials with unknown coatings, adhesives, or resins
Our simplest rule is:
If you do not know exactly what the material is, do not put it in the laser.
Some plastics can release extremely nasty gases when burned.
This is not the machine to play “I wonder what this is.”
Step 7: Put the Material in the Machine
Open the lid and place your material flat on the laser bed.
Make sure:
- It lies reasonably flat
- It won’t move around
- Nothing is underneath it
- There is enough room for the whole project
- Nothing is sticking up where the laser head can hit it
Remove scraps from previous jobs while you’re there.
A clean laser is a much less flammable laser.
And before going any farther:
Make sure the exhaust hose is actually blowing outside.
Sending laser fumes directly into the classroom somewhat defeats the purpose of having an exhaust system.
Step 8: Focus the Laser
The laser beam works best when it is focused at the correct distance from the material.
Move the laser head over the material.
Use the focus gauge to set the correct height between the laser head and the surface.
Also make sure the head can move freely without hitting:
- The material
- Clamps
- Magnets
- Warped pieces
- Anything else sticking up
A properly focused laser makes cleaner cuts and engravings.
A badly focused one mostly makes disappointment.
Step 9: Tell the Laser Where the Job Goes
Now the laser knows what to do.
We need to tell it where to do it.
For most simple projects, we use User Origin.
In LightBurn:
- Choose User Origin
- Select the appropriate green Job Origin point
- Move the laser head to the matching location on your material
- Press Origin on the laser
You’ve now told the machine:
“Put my project here.”
Step 10: Frame It
Before firing the laser, press Frame. (In RDWorks, “Go Scale”).
The laser head will move around the outside edge of the project without actually turning on the laser.
Watch the red positioning dot.
Make sure the frame:
- Stays completely on the material
- Doesn’t hit anything
- Is where you expected it to be
- Has enough room around the edges
If the framing is wrong:
Do not start the job.
Fix the material position or origin and frame it again.
Our golden rule is:
Always Frame Before You Fire
Step 11: Are We Ready?
Before pressing Start, check:
- Is the material definitely laser-safe?
- Is it lying flat?
- Did we preview the job?
- Are the speed and power settings correct?
- Is the laser focused?
- Is the origin correct?
- Did we frame the job?
- Is the exhaust running?
- Is the air assist working?
- Is the cooling system working?
- Is the lid closed?
- Do you know where the Emergency Stop is?
- Do you know where the fire extinguisher is?
And most importantly:
Are you staying here until the job is finished?
Because you are.
Never leave the laser unattended while it is running.
Step 12: Fire the Laser
Send the file to the Thunder Nova.
Check the filename.
Make sure you’re about to run today’s project, not whatever somebody was cutting yesterday.
Close the lid.
Press Start.
Now watch.
You’ll usually see a tiny flame following the laser while cutting things like wood.
That’s not necessarily a problem.
What we do not want is a flame that stays behind after the laser head has moved away.
If that happens:
STOP THE JOB IMMEDIATELY.
You’re also watching for:
- Excessive smoke
- Material moving
- Material warping
- Unexpected cuts
- Strange sounds
- The laser head approaching something
- Cooling or exhaust alarms
- Anything else that looks wrong
If you’re wondering whether something is bad enough to stop the machine:
Stop the machine.
You can always restart a laser job.
You cannot un-burn the laser cutter.
Step 13: We Made Something!
When the job finishes, give the exhaust a few seconds to pull out the remaining smoke.
Then open the lid.
Your part may be hot, so don’t immediately grab the freshly cut edges.
Remove your project and clean up:
- Take out the finished parts
- Remove scraps
- Remove any small pieces that fell through the bed
- Leave the machine cleaner than you found it
Now inspect your creation.
Did it cut all the way through?
Did the engraving look good?
Did reality resemble the thing on your computer screen?
If yes:
Congratulations.
You just used a laser to turn a digital drawing into a physical object.
Which is objectively pretty cool.
What If It Didn’t Cut Through?
Don’t immediately run the whole thing again.
First ask why.
Maybe:
- The power was too low
- The speed was too high
- The material was thicker than expected
- The focus was wrong
- The material moved
- The layer had the wrong settings
If the material hasn’t moved, another pass may work.
If it has moved, running the same job again may just create a second cut slightly beside the first one.
That’s generally not the aesthetic we’re going for.
The Whole Process
Almost every laser job comes down to:
Design → Layers → Speed & Power → Preview → Material → Focus → Origin → Frame → Fire → Watch → Clean
And if you remember nothing else:
Preview → Focus → Frame → Fire
And never leave a running laser unattended.
When in Doubt
Stop.
There is nothing wrong with stopping because you’re unsure what the machine is doing.
There is quite a lot wrong with standing beside a laser cutter that’s actively catching fire and thinking:
“Huh. That’s probably fine.”